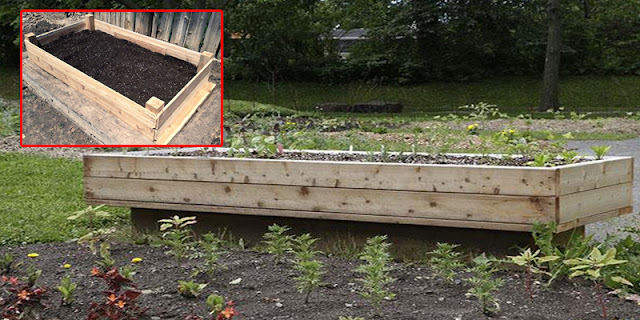
Creating Your Own DIY Raised Garden Bed: A Step-by-Step Guide
Are you an avid gardener looking to optimize your garden space or a beginner eager to start growing your plants in an efficient and organized manner? Building your own raised garden bed might just be the perfect solution! A raised garden bed not only offers better soil conditions but also provides easier access and a visually appealing layout for your plants. Follow these simple steps to craft your personalized raised garden bed and kickstart your gardening journey.
Materials Needed:
- Wood planks or bricks (preferably untreated cedar for longevity)
- Screws or nails
- Saw (if cutting wood planks to size)
- Drill
- Weed barrier cloth
- Garden soil
- Compost
- Shovel
- Rake
- Plants or seeds of your choice
Step-by-Step Guide:
1. Select a Suitable Location: Choose an area that receives adequate sunlight and has good drainage. Ensure the ground is level before constructing the bed.
2. Measure and Plan: Determine the dimensions of your raised bed. Common sizes range from 4 feet by 4 feet to 4 feet by 8 feet. Cut the wood planks to your desired lengths if needed.
3. Assemble the Frame: Arrange the wood planks or bricks in a square or rectangular shape to form the sides of the raised bed. Secure the corners by screwing or nailing the planks together.
4. Prepare the Ground: Remove any grass or weeds from the area where the raised bed will be placed. Lay down a weed barrier cloth inside the frame to prevent weed growth.
5. Fill the Bed: Fill the bed with a mixture of quality garden soil and compost. Aim for a loose, nutrient-rich soil to promote healthy plant growth.
6. Plant Your Garden: Choose plants or seeds suited for your region and preferences. Arrange them in the raised bed according to their space requirements, leaving enough room for growth.
7. Maintain and Water: Regularly water your plants as needed and monitor for any pests or diseases. Add mulch to retain moisture and suppress weeds.
In conclusion, constructing your own DIY raised garden bed can transform your gardening experience in numerous ways. Not only does it offer a practical solution for managing your plants efficiently, but it also provides an opportunity for customization, creativity, and sustainable gardening practices.
By following the step-by-step guide outlined above, you can create a personalized raised garden bed that suits your space, preferences, and gardening goals. The raised bed offers advantages such as improved soil quality, better drainage, reduced weed growth, and easier access for planting, maintenance, and harvesting.
Moreover, engaging in gardening activities like building a raised bed can be a therapeutic and rewarding endeavor. It fosters a deeper connection with nature, promotes relaxation, and offers a sense of accomplishment as you witness your plants thrive and flourish.
Remember, the key to a successful raised garden bed lies not only in its construction but also in consistent care and attention. Regular watering, proper soil management, and monitoring for pests and diseases are essential for a thriving garden.
So, whether you're a seasoned gardener looking to optimize space or a novice eager to delve into the world of gardening, building a DIY raised garden bed is a fulfilling and worthwhile project. It not only enhances the visual appeal of your garden but also provides a sustainable and enjoyable way to grow your favorite plants, herbs, flowers, or vegetables.
Begin your gardening journey today by crafting your very own raised garden bed and enjoy the pleasures of homegrown produce and a flourishing garden right outside your doorstep.

