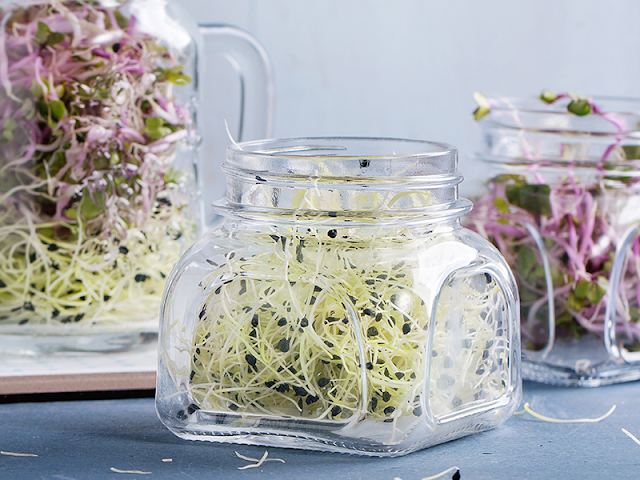
How to Germinate Seeds in a Jar?
A simple and fun method of sprouting seeds can be done using a jar. Almost any seed can be germinated in a jar, by following these basic tips.
Materials needed to grow germs in a jar
Choose a jar and a lid. Any size glass jar with a wide opening is suitable for sprouting seeds. The wide-mouth jar is recommended over other models because it is easier to rinse, drain and remove the sprouts. The jar should be large enough to hold the seeds and sprouts.
If you are using smaller seeds, such as broccoli sprouts, a quart-sized jar will work just fine. Buy a jar with a mesh lid.
Legumes and grains are a bit larger, so opt for a half-liter jar with a lid.
First, rinse the seeds to be germinated
It is essential to remove any debris, stones or broken seeds by rinsing the seeds well with cool water.
When germinating smaller seeds, it is not easy to remove broken seeds. But you can still sift the seeds and remove any non-seeds.
Place the rinsed seeds in a jar and fill it about ¾ full with fresh water - cover it with a mesh lid or cheesecloth secured with a rubber band, to allow air to circulate.
Next, soak the sprouting seeds
The general rule is to soak the seeds for at least 8 hours. Some larger seeds may require a longer soak, up to 12 hours. You will know that the seeds have soaked long enough when they have doubled in size.
Keep in mind that temperature affects soaking time. Seeds will need less soaking time at higher temperatures. Similarly, in cooler temperatures, soaking time can be much longer.
If you are using larger seeds, such as chickpeas or kidney beans, soaking can take up to 24 hours.
Next, drain the seeds
It is essential to drain the seeds well, for several hours, while allowing good air circulation. Mesh lids work well for this step, as the jar can be turned upside down and set at an angle to drain for long periods.
Finally, rinse, drain and repeat
Continue the process for 3 to 5 days: Rinse, drain and repeat! The optimal temperature is between 20 and 25ºC for most seeds.
If you are in warmer temperatures, rinse more frequently. If you are in colder climates, rinsing less frequently may be sufficient. But the seeds may not sprout as well in colder temperatures.
How do you know if the sprouted seeds are ready?
Once the sprouted seedling looks and tastes good to you, it is ready to be harvested. Rinse one last time and remove the unsprouted seeds and hulls. Store the sprouts in the refrigerator.
If you have never sprouted seeds before, taste them every day to get an idea of their taste. That's when you know they are ready to be harvested.
Be careful, seeds tend to lose their sweet flavor if left to germinate too long. Most are ready to eat as soon as the sprouting tails begin to appear.
How to store sprouted seeds?
Sprouted seeds are very easy to store. Simply transfer them to a tightly sealed glass or plastic container and place it in the refrigerator for a few days.
Many people grow their sprouts in small seedlings. This ensures that fresh sprouts are always available for consumption. Remember to make sure the sprouts are completely drained before storing them.


